| “ | Forged in secret by the Mad Smith shortly after they swore an oath of allegiance to the Charred Council. Each Horseman's armor was specifically fashioned to enhance their power and innate abilities. The armor was hidden away and meant to be used for the eventual end times... — Fury's armor description. |
” |
The Abyssal Armor is a set of armor that can be found in Darksiders, Darksiders II, and Darksiders III. In the first two games, it is the most powerful armor set.
Overview
The Abyssal armor was forged for the Four Horsemen of the Apocalypse by The Mad Smith in anticipation of the end war as their ultimate armor, most were hidden away by The Charred Council and their forces, others were stolen by demons, some were simply lost and never found. Throughout each of their adventures the Four Horsemen are able to acquire the armor via one method or another, and in each case the armor represents their ultimate war gear.
Darksiders
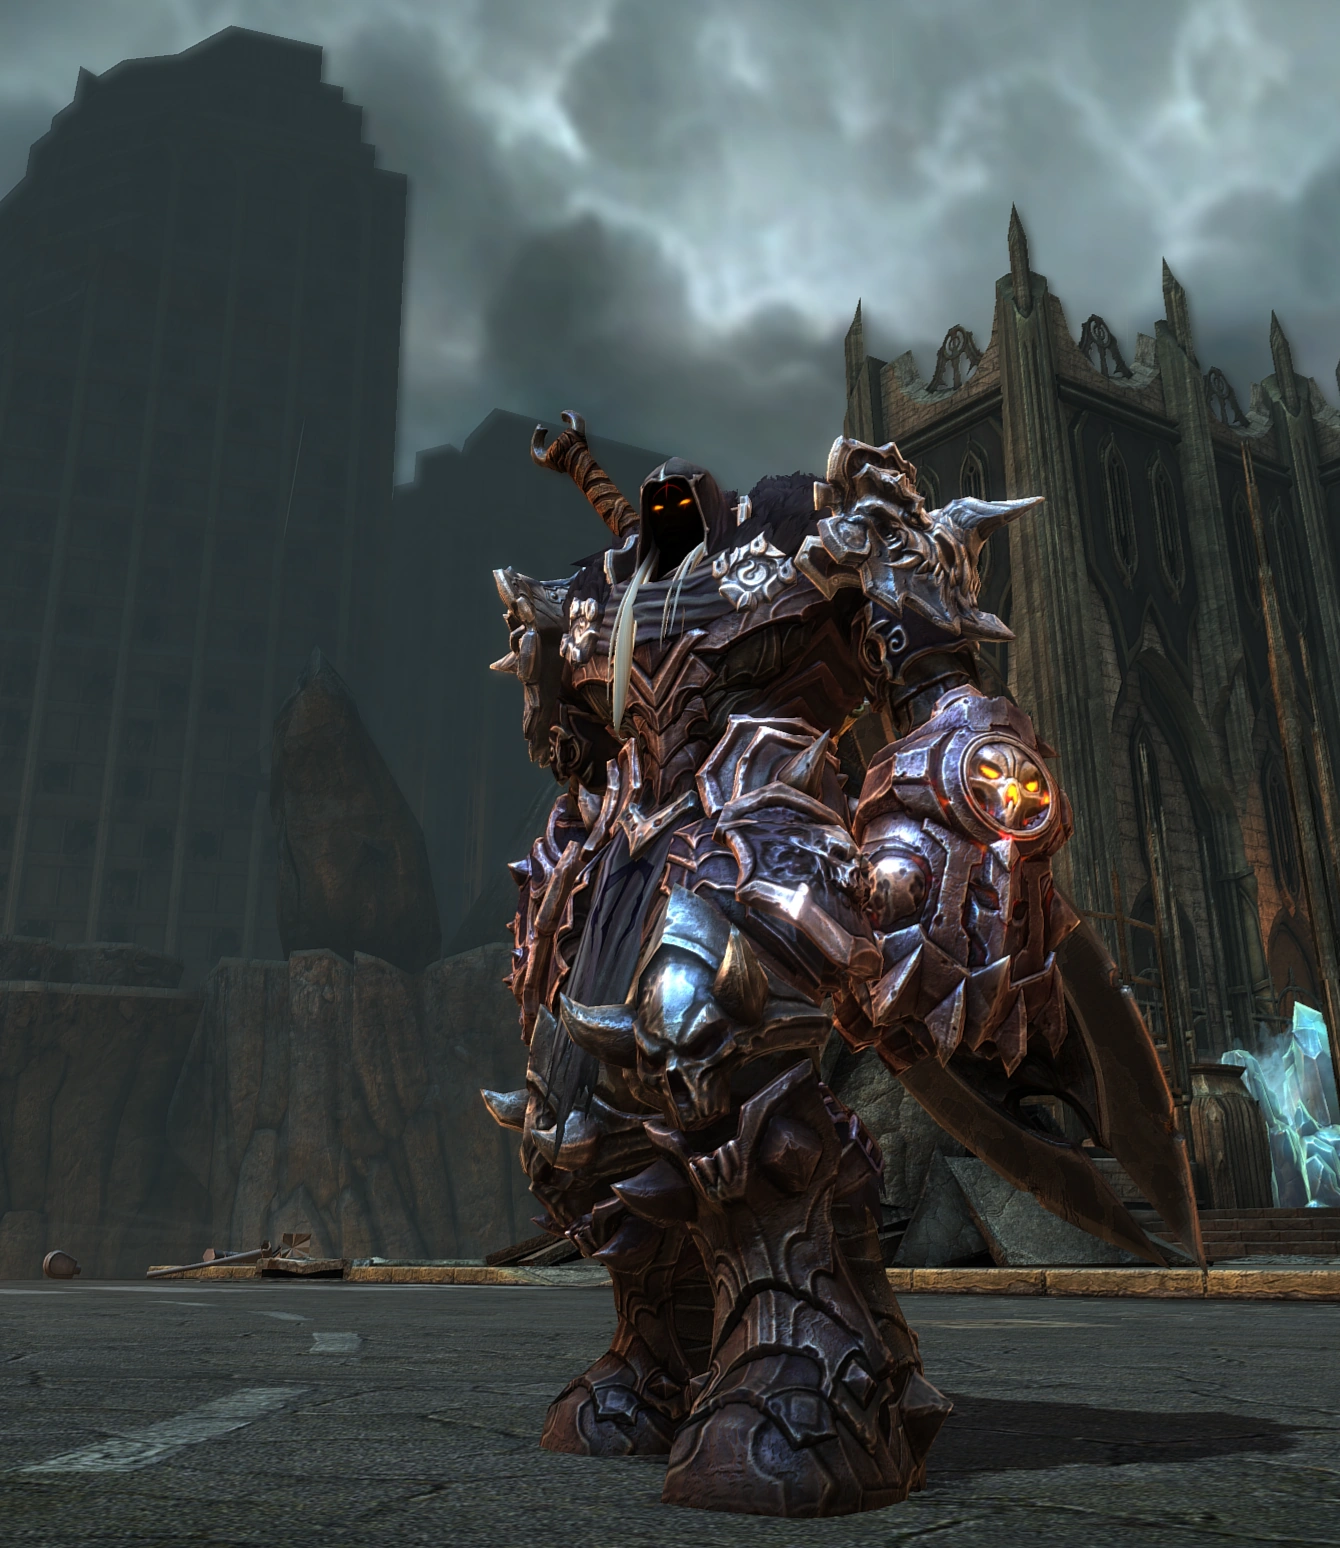
In Darksiders, it drastically increases War's defensive abilities, making enemies deal less damage and gives life upon all attacks, like a stronger version of Bloodthirst. The Abyssal Armor is broken into ten pieces which have been scattered all around the game world, from Scalding Gallow to Eden. As you face the Destroyed City - gathering them all and forging the Abyssal Armor is not essential to completing the game, but presents an additional challenge for players wishing to play more content. Please note that Abyssal Armor is not the same as the original design for War's armor. Also, it should be noted that if you manage to collect all 10 pieces during your first time through, you are given the option, when starting a new game, to use the full set of armor right from the start. If one decides to do so, one will get 500 Souls from each chest in which an Armor's piece would have been.
Pieces and locations
- Scalding Gallow: As you leave the Library, on the right hand side you will see a platform you cannot reach. On one of the pillars of this platform, there is a red growth with a bomb conveniently attached to the growth. Throw a car, or any other object, at the bomb, and the explosion will cause the pillar to fall, allowing you to reach that platform. You can also use your Crossblade, but the car is probably easier, so you can get the piece right when you get there.
- Scalding Gallow: Standing by the Vulgrim location and looking over at Samael's prison you will see a small path. Do a single jump towards it and when you are about half way down, glide forward against the wall until Shadowflight deactivates. Follow the path up to chest, then jump out and use the Shadowflight point to get back up.
- Twilight Cathedral: After you collect the three swords to raise the circular platform up out of the floor (where you access the door to the end boss), turn around and hop up the pushable block onto the balcony. To the left is a door with a Goremaw above it. Use the Crossblade to stun it and run through the door to claim the armor piece and some other toys. (It is also possible to use a bomb from the lower level if you do not wish to return later, the timing is tight however)
- Drowned Pass: Before doing the shadow challenges (or afterwards if you miss it) dive underwater near the entrance to this area (to the left) to find the armour piece in one of the caves. You actually go to this cave during the shadow challenges but you can't open chests in the real world while in the Shadow realm.
- Drowned Pass: After completing all shadow challenges you'll get this given to you by the Tormented Gate at the end.
- The Hollow: As you progress through this level, you will be in a tunnel where a Gholen Demon smashes through the right wall to attack you. The armor piece is where the demon smashed through the wall inside a small room.
- Silitha's Loom: After fighting the first Loom Warden, you'll find yourself in a room with a Chronosphere and a red grapple point above it. Grapple up to find the armor piece.
- Ashlands: Ride to the cliff east of the three connected mining towers in the Ashlands to find a shadow flight point. Up here is a Soldier Artifact and some grapple points (red) use these to get onto the roof of the drilling tower where an armor piece is located.
- The Black Throne: In the third tower, you will come across some red Crystals. Destroy them to find your armor.
- Eden: On the way towards the Tree of Knowledge, immediately after crossing the bridge that requires the Mask of Shadows to pass, take a right onto the water. Find the waterfall at the very edge of the farthest island and walk through it. Activate the Mask of Shadows to see the chest and claim your final piece of armor. If you missed it don't worry if the in-game conversation indicates no return. The portal next to Azrael in Leviathan's Drift can take you back there anytime.
Video walkthrough

Darksiders - Abyssal Armor Piece Locations
A video showing the locations of all the pieces.
Darksiders II
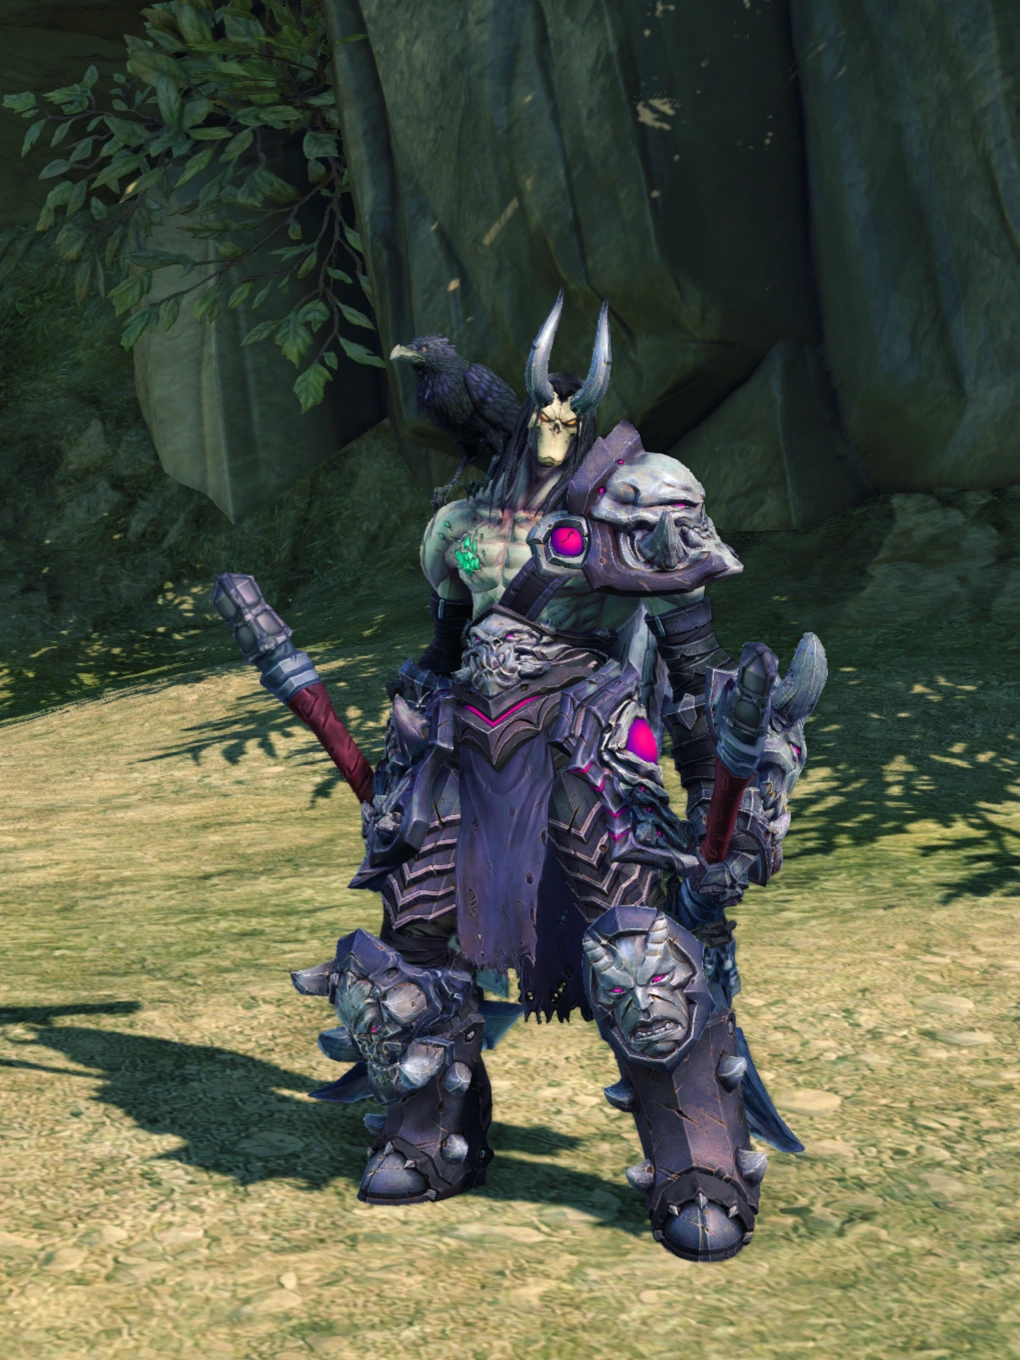
There is an Abyssal Set for Death in Darksiders II. Just like in the first game, it is broken into pieces, but each piece is individually equippable and greatly increases Death's Strength, Defense, Arcane and Crtitical Chance stats. When worn together, they produce even greater effects. However, players should still be cautious when facing elemental attacks (Notably Argul, who has the possibility to kill Death with one Hit using his Heavy Staff Slam if the Resistance Stat is too low), for the Abyssal Armor does not increase Death's Resistance Stats, making him vulnerable to Elemental attacks.
Pieces and Location
- Abyssal Spaulders: Rewarded after completing wave 76-100 in the Crucible
- Abyssal Plate: Reward for breaking all the breakable objects in the Death Tomb in Shadow's Edge. All 40 pages of the Book of the Dead must be collected and returned to Vulgrim to open the Death Tomb.
- Abyssal Gauntlets: Given by Ostegoth after recovering all 30 lost relics.
- Abyssal Boots: Rewarded after completing wave 26-50 in the Crucible
Darksiders III
In Darksiders III, Abyssal Armor can be retrieved by Fury after completing the Keepers of the Void DLC.[1]
Angered beyond reckoning by Vulgrim for tricking her in massacring the inhabitants of the Serpent Holes on his behalf the demon is narrowly able to bargain for his life by gifting Fury this armor. The armor dramatically enhances all of Fury's stats by a significant margin, and in New Game+ the armor can be made more powerful by Ulthane through the use of Oblivion Ore.
Stats
- 10% Physical and Arcane Damage
- +90 Health Regeneration per Minute
- +10 Amount of Wrath Generated per Minute
- +10% Lurchers from Shattering Crystals


fury abyssal armor
Trivia
- The Abyssal Spaulders in Darksiders 2 are the only piece of equipment to affect Death's head, adding horns.
- In Darksiders 2, the Abyssal Armor set pieces level with Death, growing stronger as he does. It is the only armor set to do so.
- The Abyssal Armor worn by War in the first Darksiders bears a close resemblance to early concept art of War.